


November 06, 2019
Affinity Designer
by Brad Schmidt

Having worked at Friesens since the beginning of the desktop publishing era, I have seen many changes develop. An area that has always fascinated me is the variety of software packages that I have had the opportunity to work with.
PageMaker 4 was my first exposure to desktop publishing software. Then came the drawing program turf wars between Aldus Freehand and Adobe Illustrator. I still enjoy a discussion on the rise and fall of the titans in the industry as I think back to the sheer dominance of QuarkXPress version 4
and how Adobe was able to wrestle away the bulk of the market share with a new player in this space in the form of InDesign.
Today, having the luxury of looking back through history, I do not think it was the feature set of InDesign that brought about the migration away from QuarkXPress. Rather, it was the licensing and pricing model of the Creative Suite that was the driving factor. The perfect combination of Photoshop, Illustrator, and InDesign at an irresistible price point proved to be too much to maintain the dominance of QuarkXPress.
Since Adobe has moved to the subscription model, I now see Adobe in much the same light as Quark when InDesign first came to market. To shake up the market today, a new program would need to compete in the combined photo, illustration, and page layout space at an exceptional price point. I believe a new player has emerged with a great suite of tools that uses a purchase pricing model rather than the subscription model that has become so pervasive today. The Affinity Suite, which includes Affinity Designer, Affinity Photo, and Affinity Publisher, is uniquely positioned to change the desktop publishing landscape.
Serif released Affinity Designer in October of 2014. Here are features of Affinity Designer that I think are necessary to be considered as a contender in the illustration space.
For illustration, the basic toolset begins with drawing and shape tools. As with other programs, Designer includes a pencil tool for freehand drawing. Along with the pencil tool, the Designer includes a selection of basic shapes to get started. Rectangles, ovals, boxes with rounded corners, along with more complicated shapes like starbursts, pies, polygons, and even donuts. These shapes can all be combined in unique ways using the various
Geometry tools. These tools allow for shapes to be combined to make more complicated shapes. Use the Subtract tool to minus one shape from another, or to cut holes in or slice off portions of an object to create a new shape.

With a little experimentation, while drawing shapes, it was easy to see that the drawing experience had been well thought out. Holding the command key immediately sets the orientation of the object to the centre. Holding the shift constrained the proportions. This makes it simple to create a rectangle or constrain for a square. Using the control key, the shape was rotated 45 degrees. Using these keys in combination, the object can be centred, constrained, and rotated seamlessly, all while drawing the object.
Precise measurements are also an important element when creating objects. It is great to freehand objects, but often precision is needed to make sure objects are the same size. I found the Transform panel to be useful for this. X and Y coordinates can be entered for exact locations. The width and height can also be specified, along with rotation and skew values. I was pleasantly surprised that the fields accepted basic math such as /2 to divide the width in half, or using the plus, minus, and multiply operators as an effective way to control the shape of the object.
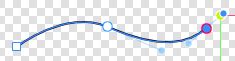
Any vector illustration program will also come with a robust set of bézier tools for precision drawing of shapes. Designer does include a pen tool. The pen tool feels quite intuitive to use compared with other vector illustration programs. After drawing a point with the pen tool, it is very simple to use the handles to modify the curve of the line. Using modifier keys, the points can easily be transformed from curves to sharp corners, or a straight line extending into a curve.
There are many options for controlling strokes, including selecting the weight and colour of the line. There are more precise controls, such as determining the cap, join, and align settings. The lines can even be set to scale with the object so that the strokes change line weight as the artwork size is enlarged or reduced. Strokes would not be complete without the option to create arrowheads.
Once paths have been created, text can be made to follow the path. It is a simple process to slide text along the path for precise positioning. The
path can also be altered after it has text flowing along with it.

Transparency has also become a standard for any modern drawing or design program. Affinity Designer sports a healthy set of options here,
providing special effects like Outer Shadow, Inner Glow, and Bevel/Emboss with precision opacity and radius controls. Each object is automatically created as an individual layer. Object layers can be organized in groups. Transparency effects can then be applied to individual layers or grouped layers. There is even a dedicated transparency tool for applying advanced transparency blends.
There is a Guides Manager to assist with document construction. This tool allows for precise placement of multiple guides in both a horizontal and vertical configuration. The use of guides, along with object snapping, is really helpful when creating precise shapes or sizes.
Affinity also has support for multiple colour models. These include options for RGB, CMYK, LAB and Grayscale. There is also support for the various
PANTONE colours for spot colour selection.
Another feature that I really appreciate is the History panel. History is presented as a slider, so you can easily scrub backward to perform multiple undo, or slide forward to redo the previous undo. The history can even be saved with the document so that undos can be performed on a previously saved drawing.
Some tools that are not present in the current version and leave room for further development include some type of blending tool. Blending tools allow the selection of two objects, creating a series of steps to form the intermediate objects that will morph one shape into the other. This is useful for unique gradients and also for creating a series of transforming objects.
One tool that I thought might be available but I was unable to find was the ability to select the same stroke weight or same-fill colour.
Renewed competition in the desktop publishing space is sure to raise the bar for all applications and improve the book design tools we use on a daily basis.